Setting up the oxyCLONE
Fill the oxyCLONE with water to the fill line. We have found the best results from bottled spring water. Municipal tap water is also acceptable, and the chlorine has proven beneficial. We do not recommend using reverse osmosis or distilled water with the oxyCLONE.
- oxyCLONE 20 - use 1.75 gallons of water
- oxyCLONE 40 - use 3.7 gallons of water
- oxyCLONE 80 - use 7 gallons of water
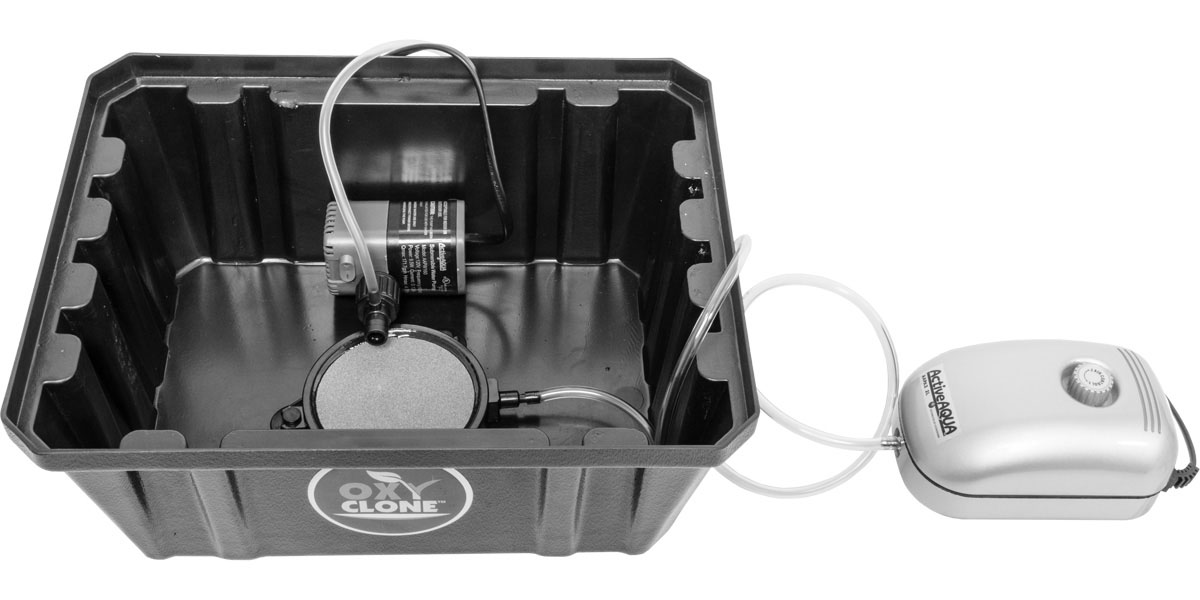
Place the Active Aqua submersible pump, with Venturi air intake tubing attached, so that it sits below the fill line with the suction cups against the wall. The air tube, Venturi tube, and power cord will come out of the oxyCLONE through the small cutout in the back of the cover. Click on the thumbnails below to view the proper positioning of all components.
 oxyCLONE 20
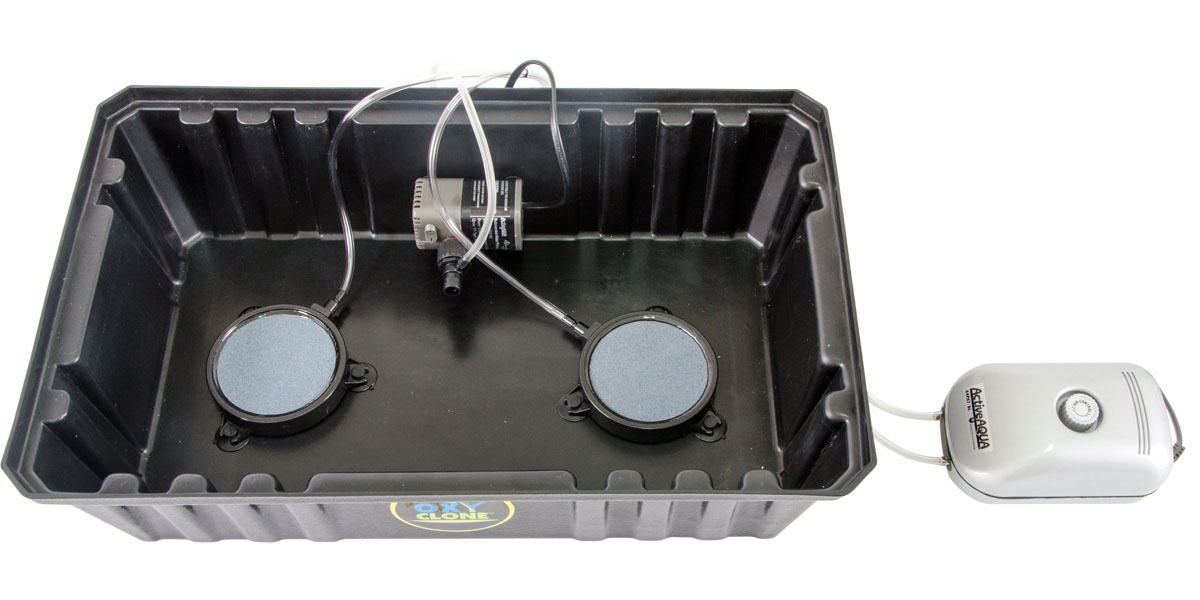 oxyCLONE 40
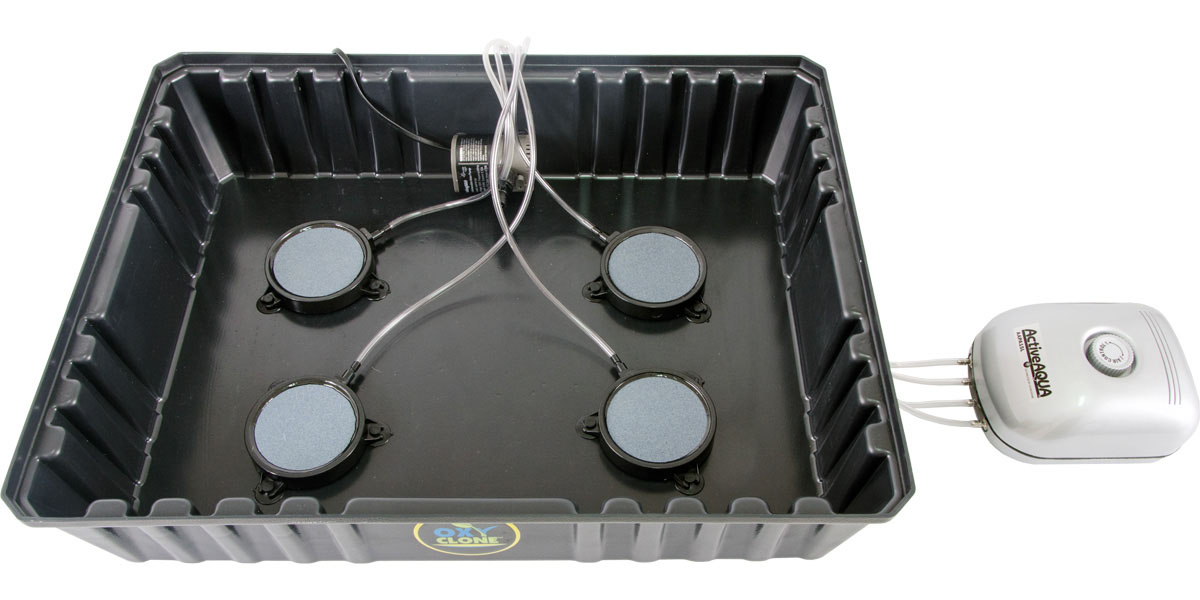 oxyCLONE 80
Remove all packaging from your Active Aqua air pump. Connect one end of the ¼" clear tubing to the air pump outlet, then connect the opposite ends of the clear tubing to the inlet of the air stone. NOTE: Make sure to mount the air pump unit on a stable dry surface above the water level near a 120V power source.
Position the air stone at the center of the bottom of the reservoir, directly in front of your Active Aqua submersible pump. Please note that the included air stone by Active Aqua will begin producing bubbles as soon as you set up your oxyCLONE. However, the air stone will produce even more bubbles after it has become fully saturated. The saturation process may take a day or two, but this will not delay the rooting process.
Plug in the air pump and the submersible pump. Observe the aeration of the water and make sure you are getting plenty of bubbles and movement. If you are not, you may reposition the water pump and adjust the Venturi air valve until you feel that you are receiving the maximum turbulence (the turbulence provides vital oxygenation). You can adjust the air and water pumps for minimum or maximum oxygenation. Run your oxyCLONE continuously 24 hours per day.
Attach cover (lid). The cover fits very snugly inside the rim. The tight fit helps to prevent leaks and maintain high levels of humidity and oxygen inside the cloning chamber.
Cloning Tips
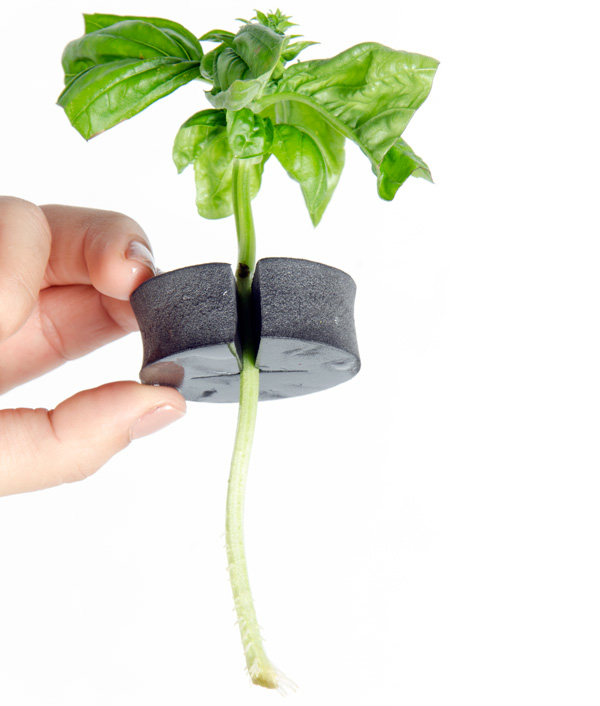
Figure 1

Figure 2
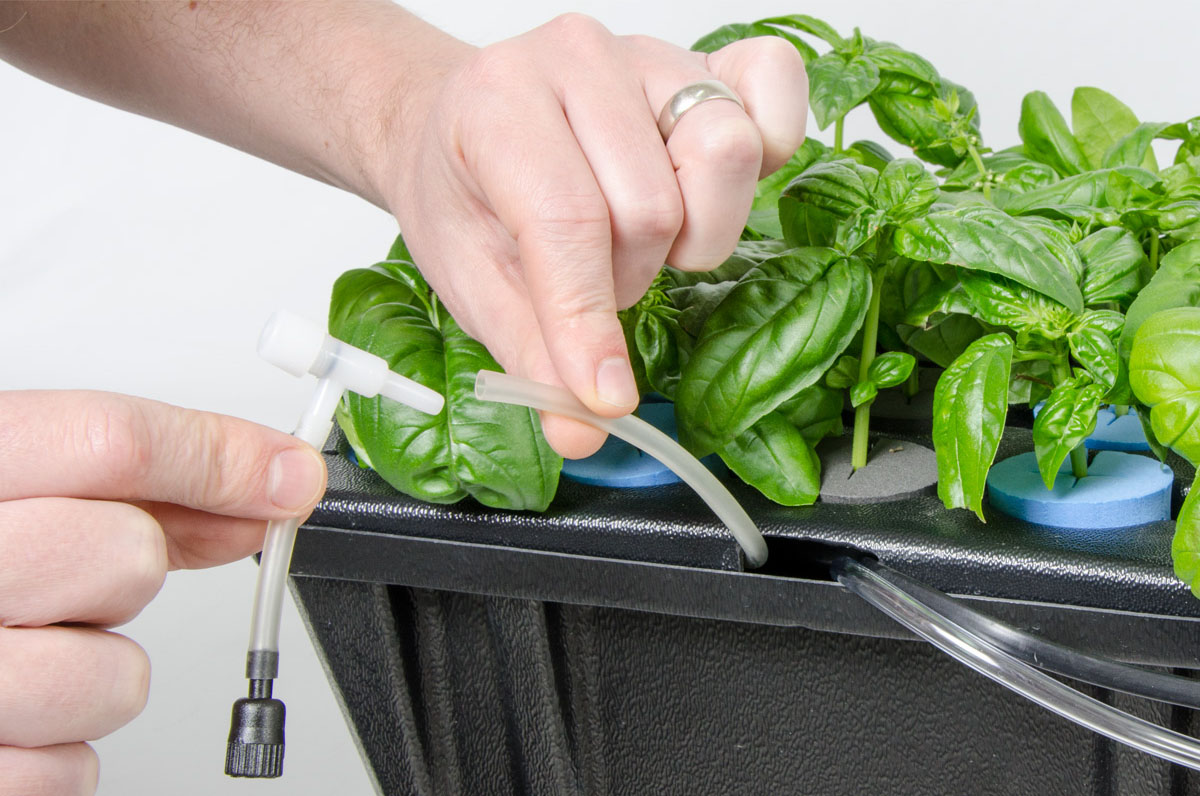
Figure 3
Place your cuttings in the oxyCLONE so their stems are submerged into the water (around 1" deep or as desired, up to 3". Please see Figure 1 for an illustration of this.)
When taking your cuttings, remove extraneous leaves. Some growers also cut the largest leaves in half (Figure 1). This allows the cutting to focus its energy more on the development of roots and less on keeping these older leaves alive. Always remove leaves that would end up below the oxyCERT collar.
While clones can be small or large, try to select cuttings that are approximately six inches in total length.
The healthiest clones come from healthy parent plants grown under T5s, induction lights, or metal halide lamps
Reduce the parent plant’s fertilizer dosage by half, one week before taking cuttings.
Wash hands or use a fresh pair of nitrile gloves. Take cuttings using razor sharp pruners that are clean and sterile.
Please see Figure 2 for an illustration of how the system looks when properly set up and supporting healthy, rooted cuttings.
For additional aeration you can remove the muffler attachment from the Venturi tube, although this will generate additional noise (see Figure 3).